LG Inform Plus Guide To Natural Neighbourhoods
What is it?
Natural Neighbourhoods is a unique tool to help anyone create new types of area based on standard geographies – Wards, MSOAs, LSOAs, Output areas, etc. – and to publish these new, meaningful areas as open data. Once published, these custom areas can be used to view statistical data from LG Inform Plus and other APIs.
The majority of data available on LG Inform Plus relates to standard geographies, real areas identified by codes, e.g. E01020161. But not all local authorities use these standard codes to talk about their area, some choose to define their areas in different ways – community partnerships or action zones, for example. Natural Neighbourhoods allows anyone to map those custom areas and see the data underneath.
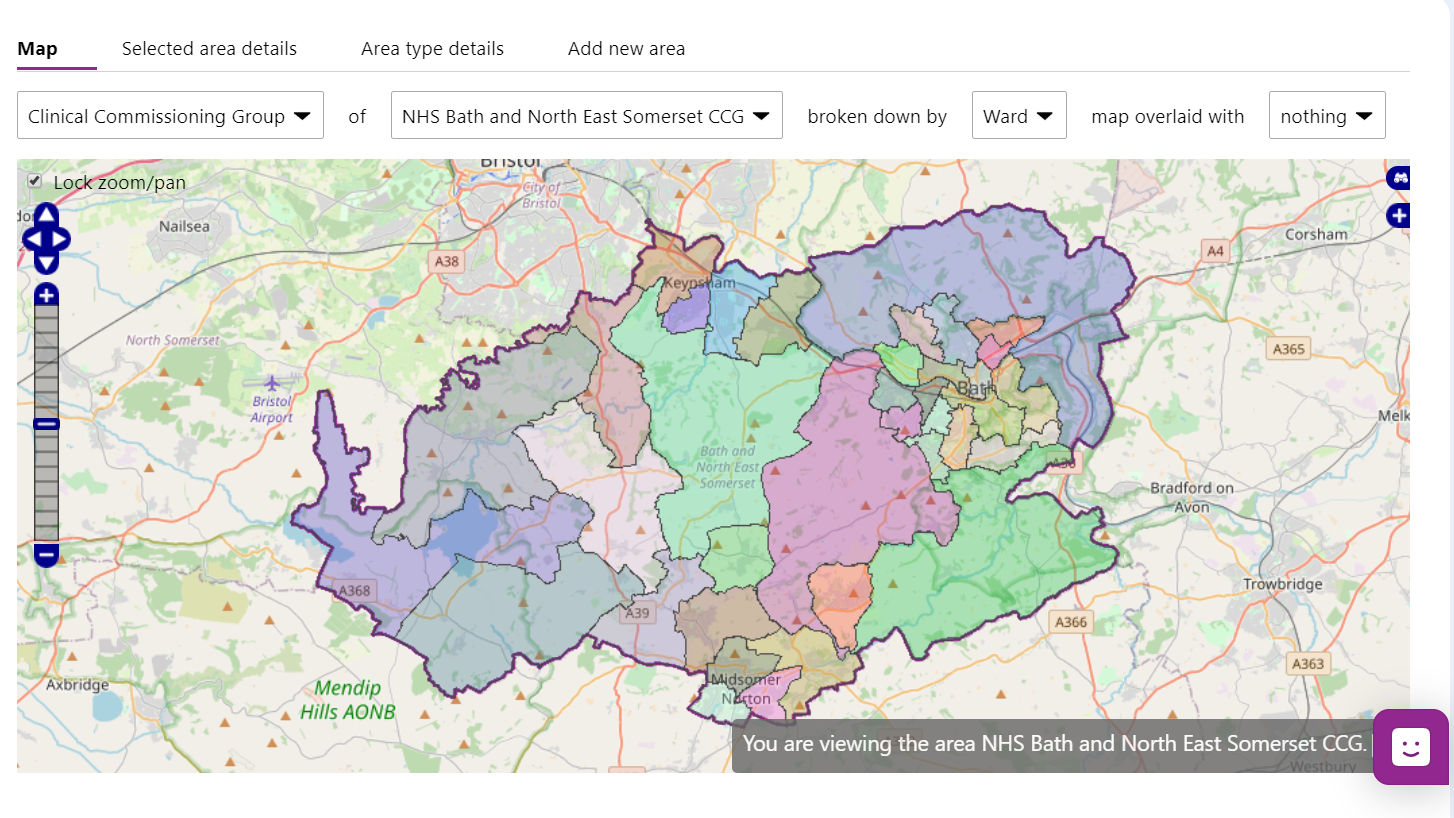
Here is an example:
Back to top
Add an area
Follow these instructions to add an area to Natural Neighbourhoods. You'll create and name it, then we'll place it on a map. Afterwards we'll show you how to view the data for that area.
1. First ‘Sign-in’ to LG Inform Plus.
2. You can access Natural Neighbourhoods either via the left hand navigation on the ‘Home’ page or via ‘Your data and metrics’ on the landing page
First click on ‘Natural neighbourhoods’ in the left-hand side menu.
This takes you directly to the ‘‘Natural neighbourhoods’ interface where you can create your new area map.
The controls for creating a new area are located on top of the 'Map'.
3. Click the highlighted 'Add new area' button.
This dialogue box will open:
4. Select an ‘Area type’. Open up the drop down by using the black arrow and choose one from the listing which matches the type of area you're trying to create (e.g. school catchment area) using the drop-down.
Note, all areas shown can be used to view data, however, to create a ‘new area’, you can only choose area types with no ‘padlock’. Some helpful metadata is available to aid your selection.
If the area type you want to use doesn't exist, or can’t be easily found, please get in touch with the support team. Or use the chat function:

5. Use the 'area name' text box to name the area you're creating.
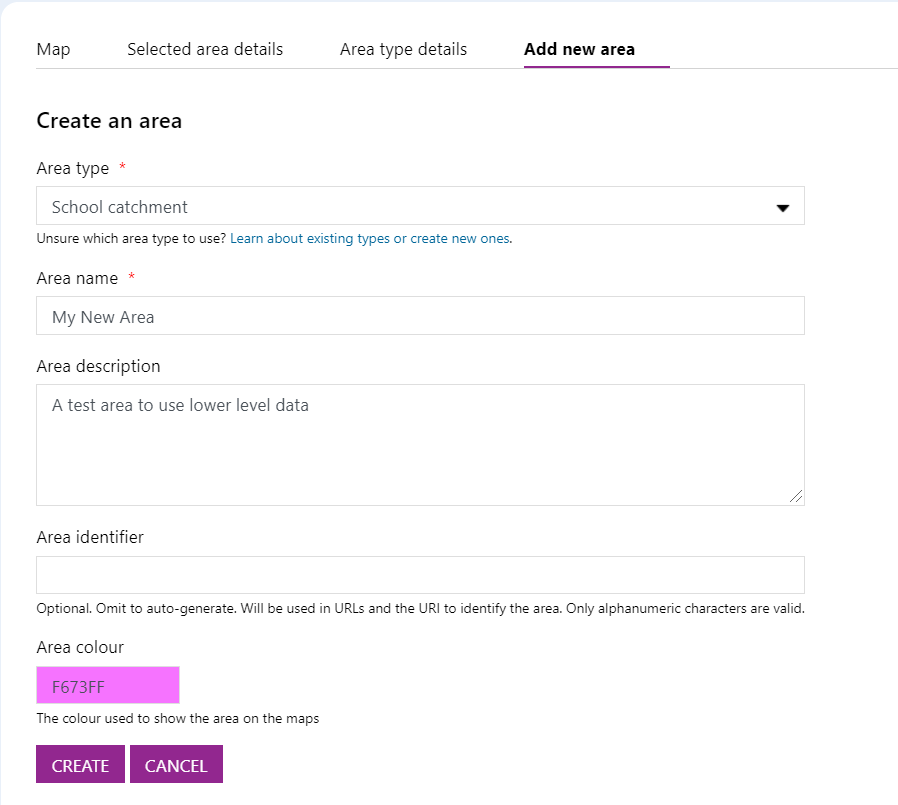
6. Use the 'area description' text box to describe your area. This is optional but can be useful to help explain your area. For example, you can write about how the area's boundary has been decided whether that's based on consultations, a predefined radius or another method.
7. An ‘area identifier’ is optional and a code used in URLs to identify your area, for example, COMPHOS for Compton Hospice. This is optional and we will auto-generate an identifier if you choose not to create your own.
8. Area colour is chosen for you by default but you can change it by clicking in the colour box and choosing your colour.
9. Finally, click ‘Create’.
Great! You've set up your area and created a space for it within our database. Now we need to set its boundary. By setting the boundary, LG Inform Plus knows which standard geographies to use to draw data for your area.
Back to top
Set the boundary
There are a number of options available. You can set an area's boundary by drawing a shape, picking child areas, or uploading KML (Keyhole Markup Language) shapes.
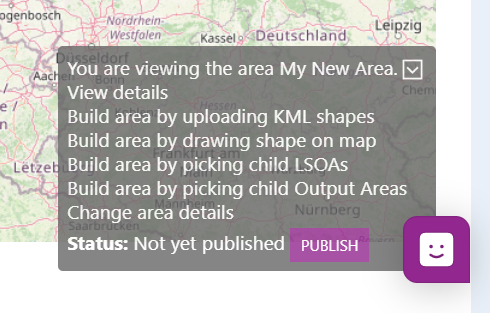
If you have already created your area on GIS or mapping tools, you can upload its KML shape to Natural Neighbourhoods to set its boundary and see data for that area. To do this, simply click 'build area by uploading KML shapes', choose the file from your machine or enter its URL, and finally click ‘save’.
For most local authority users, building an area by picking child areas will be the best method, which allows you to select the smaller component areas to build your custom neighbourhood. To do this:
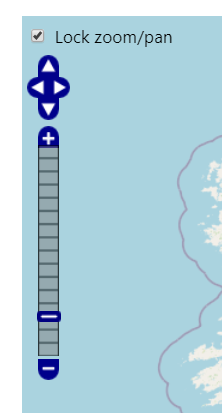
- Find your local authority on the map by using the zoom slider on the left of the map. Uncheck the ‘Lock zoom/pan’ first:
- Click 'build area by picking child [area types]'. You are able to build the area using wards, LSOAs or Output Areas, but email support@lginform.local.gov.uk if the type you would like to use is not available.
- Once the ‘Layers’ are loaded just click on the map to see the shapes appear and build your area. Double click to remove unwanted ones. You can add as many child areas as you like.
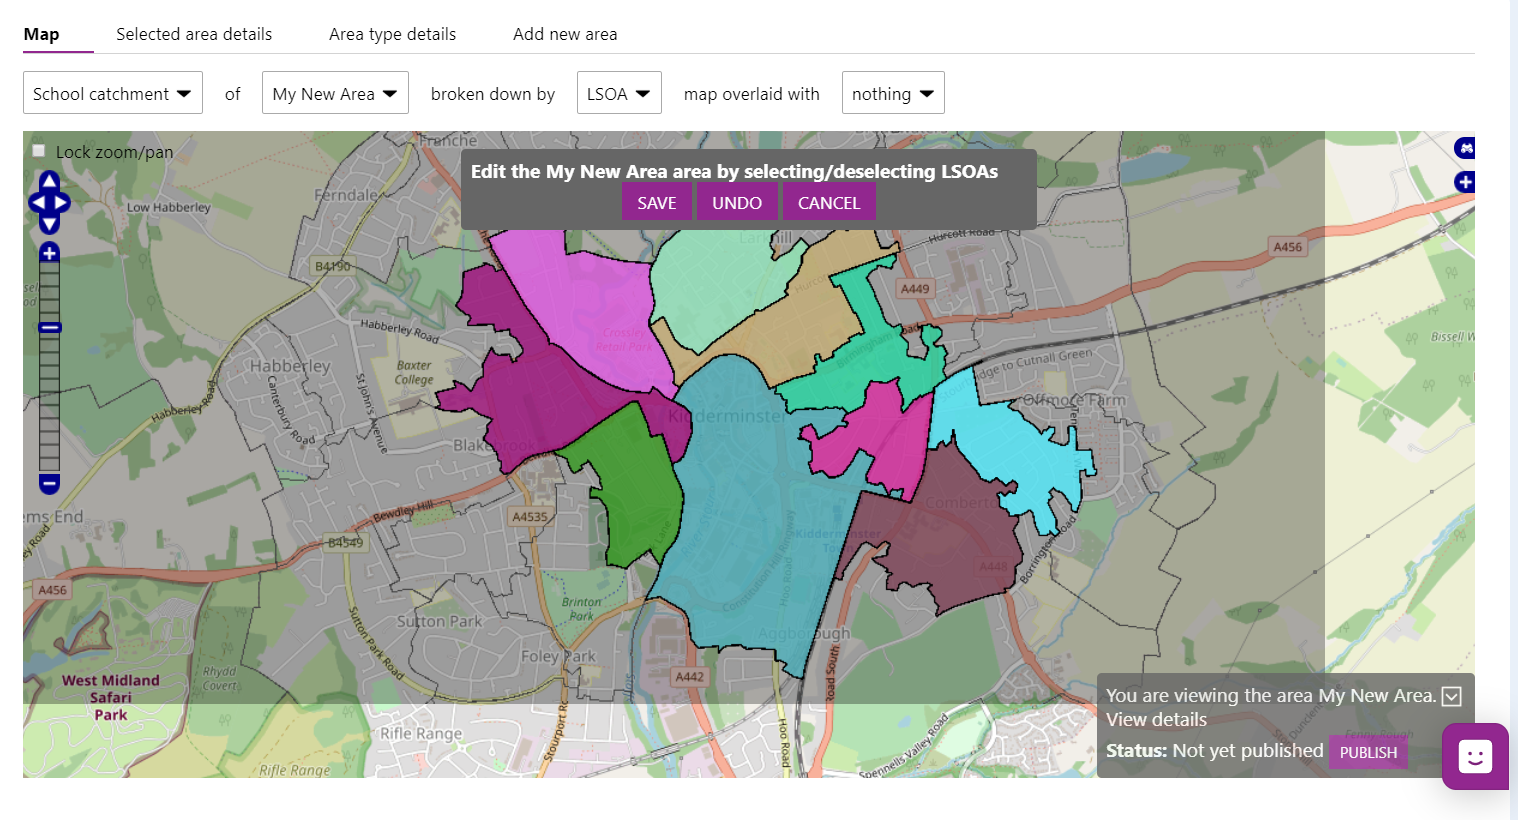
- Once you have selected all the areas you need to include, click ‘save’ and your boundary will be set. You will be able to see your neighbourhood on the map.
- Use the modifier, ‘broken down by’, to view the LSOAs for your area. Select LSOA and click ‘Apply’. Your new area will appear.
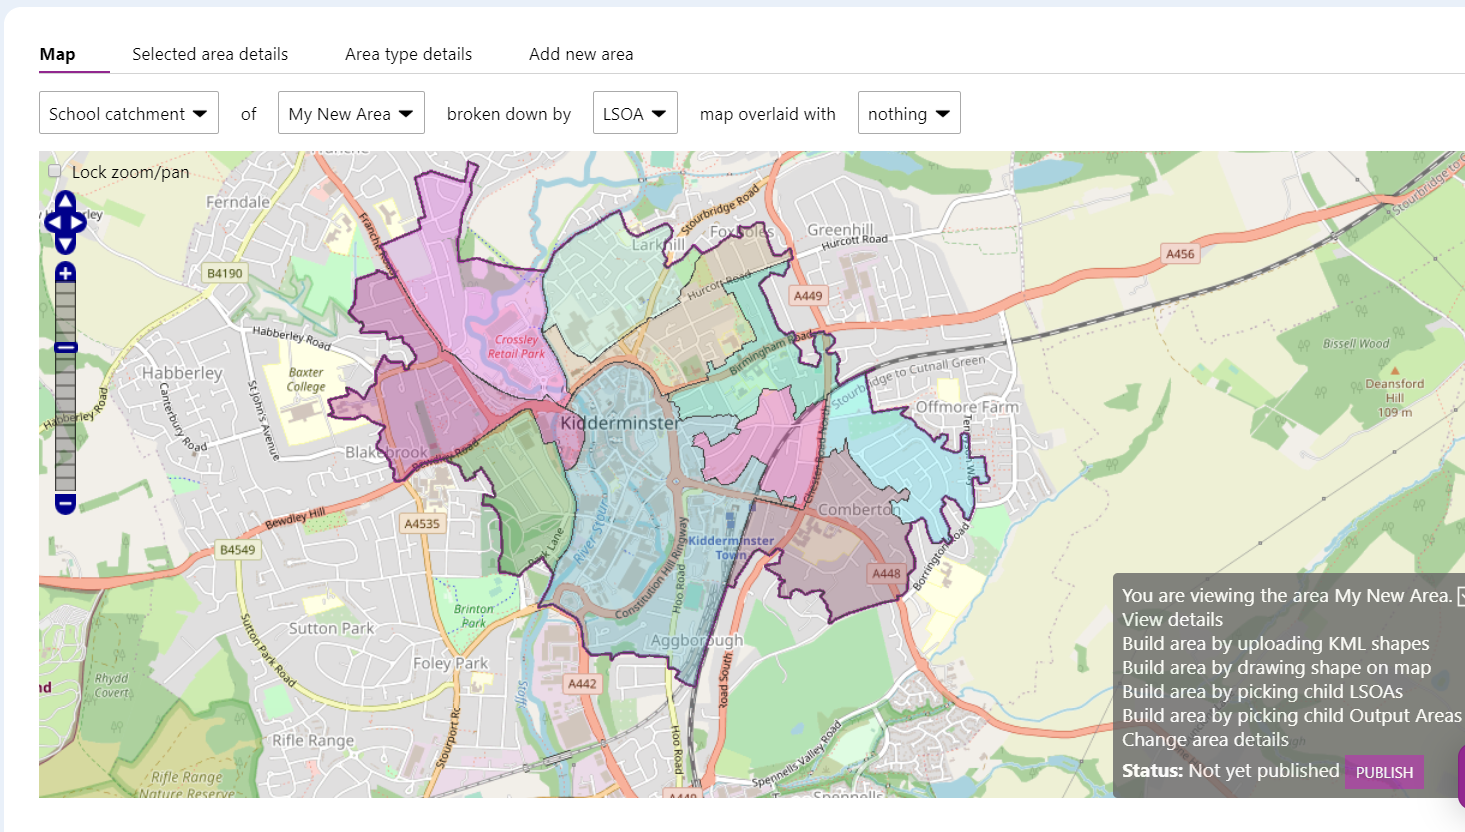
If the boundaries of standard geographies are not applicable to the type of area you want to build, you will want to draw a shape to set your area's boundary. To do this we use a best-fit methodology to decide which child areas fit inside the boundary you have drawn.
There are alternative ways to set your boundary. If you are unsure about selecting LSOAs it is possible to set a boundary by drawing a shape.
- As before, find your local authority on the map.
- This time click 'build area by drawing shape on map'.
- You will draw the area by placing point-to-point markers. Click on the map to start drawing your area.
- Move your mouse and add another point. Notice how a line appears between the points forming a part of your boundary. If you need to move around the map, click and hold your mouse then drag the map. A point will only be placed when you click the map while it is stationary.
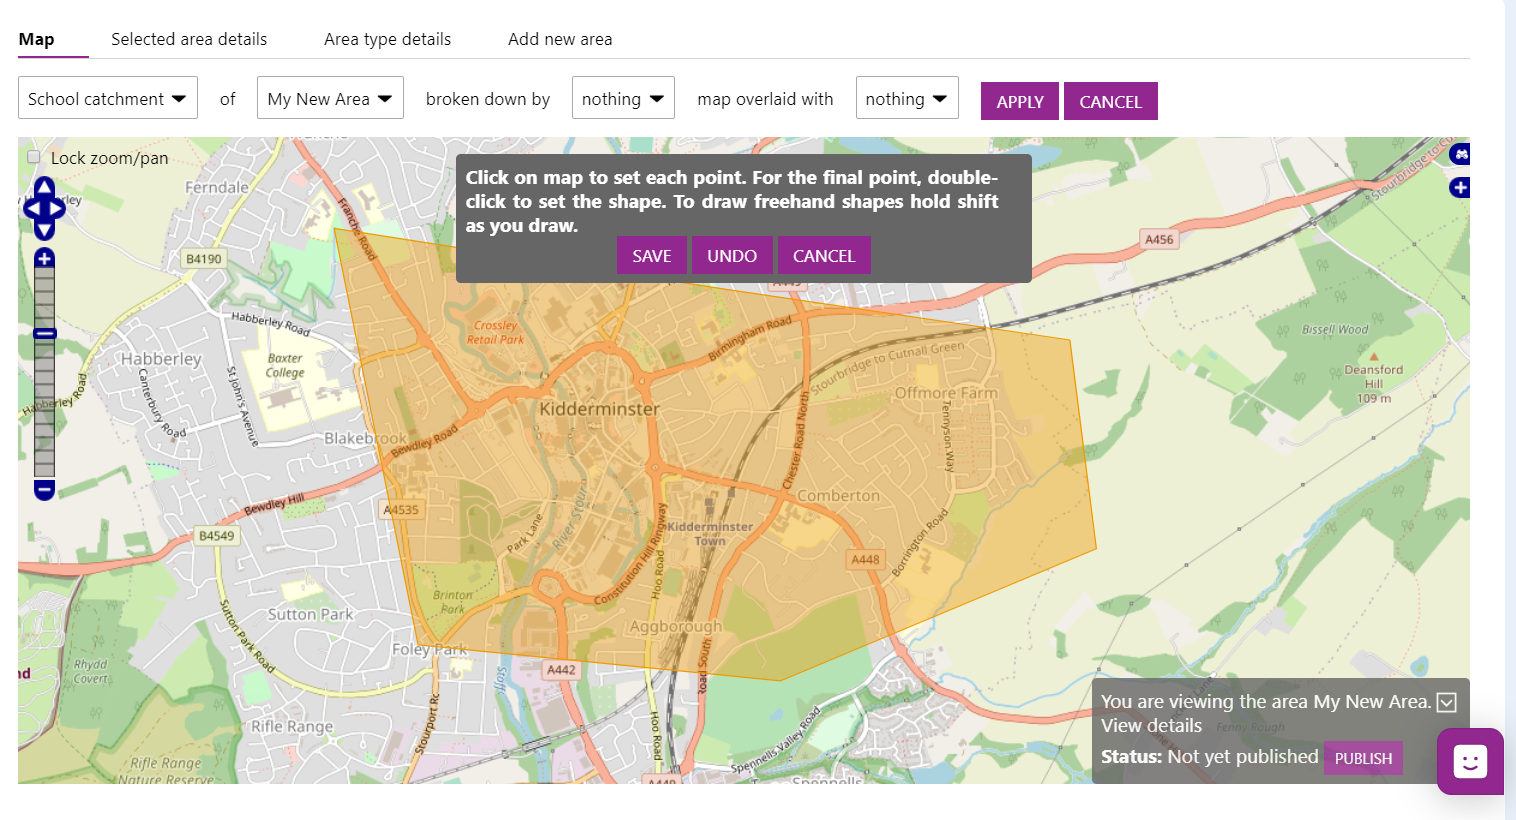
- Keep placing points on the map until you have drawn your boundary. For the final point, double-click to set the shape.
- If you are happy with your area, click ‘save’ to set the boundary. If not, click ‘undo’ and go back to step 2.
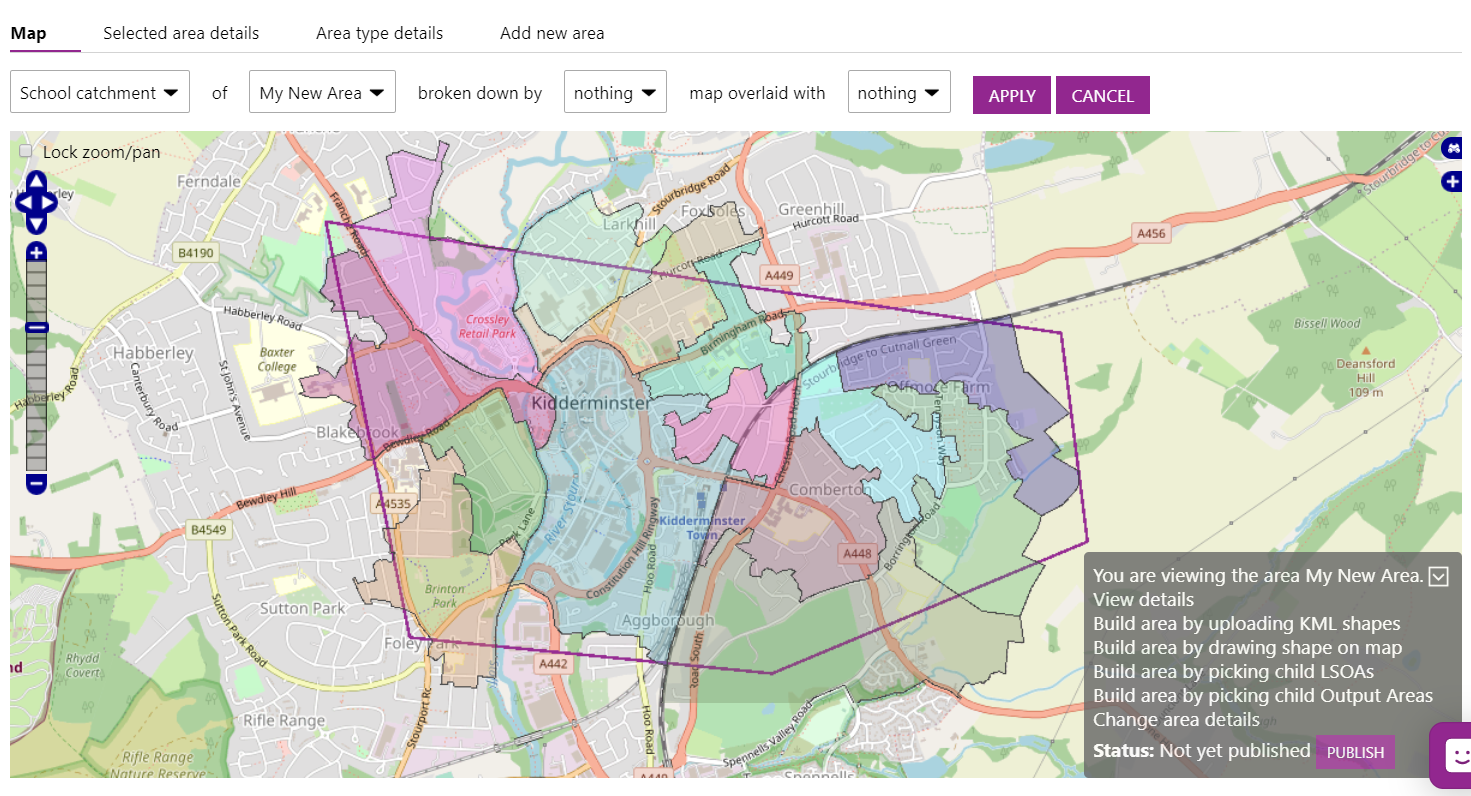
- Once you've clicked ‘save’, you will see your neighbourhood on the map.
If you would like to see which child areas e.g. ‘Output areas’ have been selected by the best-fit methodology, use the selector at the top of the page to choose a breakdown.
Back to top
Publish the area
Before you can view the underlying data, you will need to ‘publish’ your new neighbourhood. This will allow you to run reports, check statistics, benchmark against other areas and much more. After you have published your areas you will still have time to edit them before finalising any changes.
There are two ways to publish your area:
- Click the 'selected area details' tab or click ‘Publish’ at the bottom of the area.
- If you go to the 'selected area details' you will see the ‘Status’ of your area. Just click ‘Publish’ to be able to use/view the area in your reports.
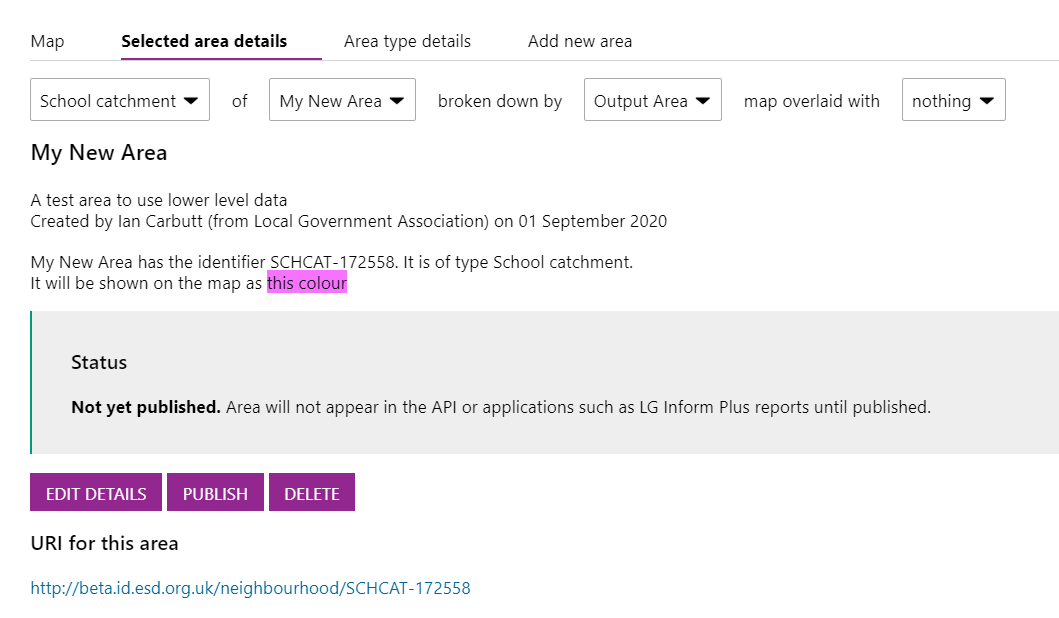
The dialogue box will change:
You still have the option to ‘Edit’, ‘Make Final’ or ‘Delete’ the new area. If you chose to make the area Final, it will no longer be editable and remain as it is unless our support team remove it for you.
Once you have clicked ‘Publish’, the area will be ‘published’ overnight and you will be able to see or build a report based on your area the following day. You will receive a notification from the support team that your area is ready for use.
Once you have seen the data, you may wish to edit your area to correct errors or alter the boundary, which you can do by following ‘set the boundary’.
Back to top
View the underlying data
Now that you have waited 24 hours for your neighbourhood to be published, you will be able to see data for your area in LG Inform Plus's reports and API products. We'll take a look at viewing the data in ‘reports’ now, but get in touch with the support team if you need help using the API.
- ‘Sign in’ to your account.
- You can go to ‘My Reports’ to view those reports already created by yourself or you can go to ‘Data and Reports’ to use the new area in one of the pre-loaded reports in the system. Here we will click on ‘Data and Reports’:
The ‘Data and Reports’ Hub page will open.
On this page, you will find recent reports you or your organisation have created plus a set of reports created by the LGA.
We recommend taking a look at the ‘basic facts report’ for a quick overview of your new area.
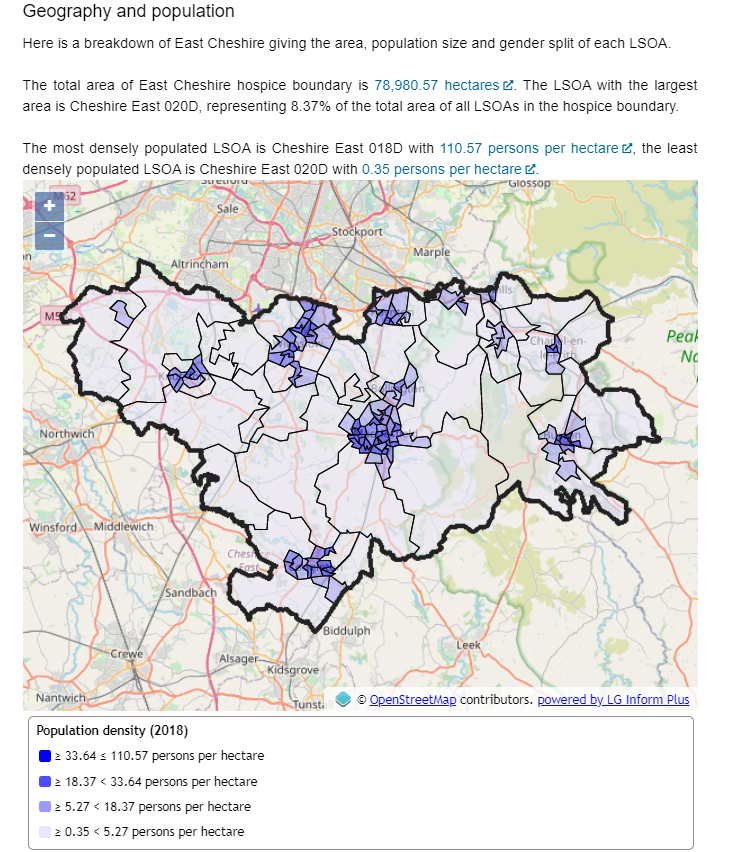
You can see from the three modifiers, the charts and tables within the report are focussed on the local authority and ‘Ward’ level metrics and data. E.g. Population Density as shown below:

By adjusting the modifiers to use your newly defined area the basic report can be re focussed so it shows the same data but for your new area. As shown below in the example of a ‘Hospice Boundary’ for ‘East Cheshire’ by LSOA:

Back to top
Need more help?
We hope you found the introduction to Natural Neighbourhoods useful, but if you have any further questions or would like to learn more, fear not! Help is at hand.
Use the Help link in the navigation bar anywhere in LG Inform Plus to read through our online help guides, or send an email to support@lginform.local.gov.uk and the support team will get back to you (Monday – Friday, 9 a.m. to 5.30 p.m.).
Back to top