LG Inform Report Builder Help Guide
Table of Contents
All registered users of LG Inform are able to build a basic report. The Report Builder is a step-by-step wizard to help you build and save a report in LG Inform which you can later share.
To access the Report Builder, please ensure you are signed in.
- Once signed in, you will see Report Builder as an option at the top of the page:
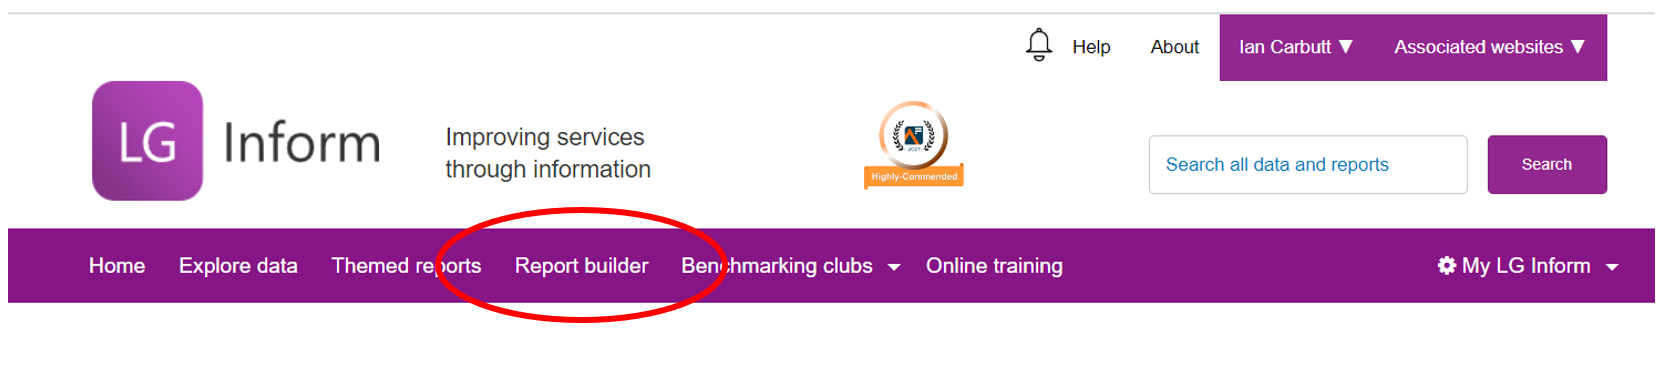
- Click on Report Builder to bring up the page shown below:
You will see various options to create a new report, edit details, add different components and export the report.
Getting started
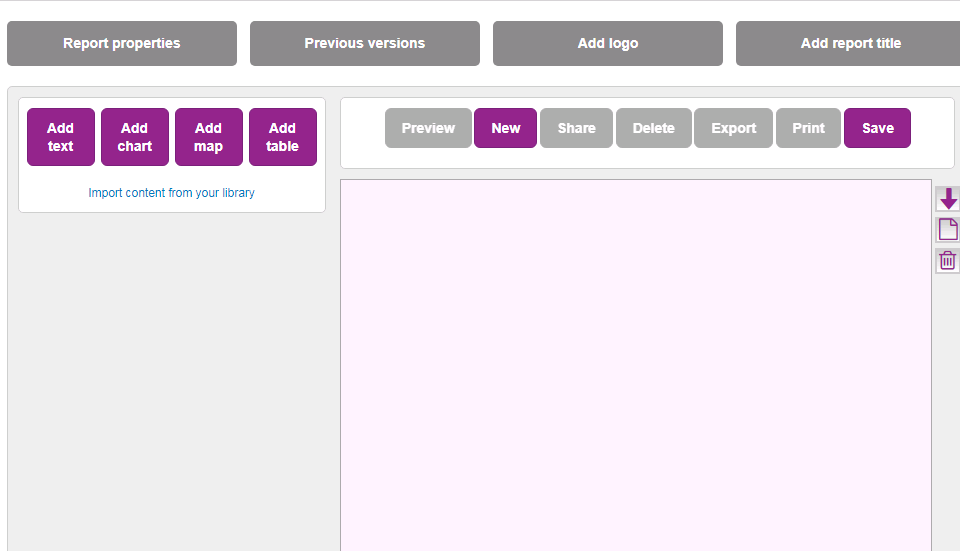
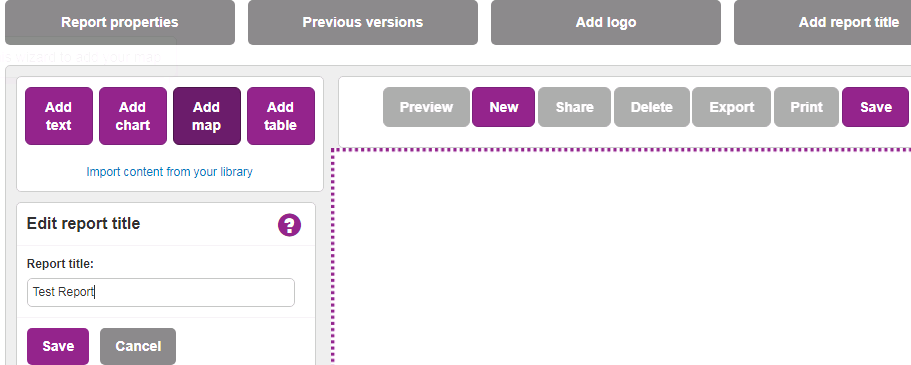
You have the following options to set the main properties of your report:
- Report properties
- Previous versions
- Add logo
- Add report title
![]()
Report properties:
Selecting Report properties will give you the option to name your report and give it a description.
- The report name will show when searching and will also appear in My Library in LG Inform. You will need to add a name to your report before being able to save it, but all other elements can be added at any time.
- The description is optional, and is shown within LG Inform but not on the report itself.
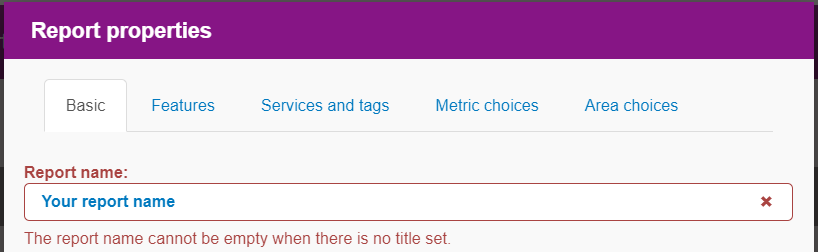
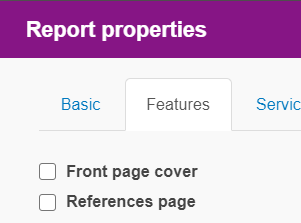
- You can choose whether to have a front page cover or references page
- The references page will provide a list of sources for all metrics used in your report
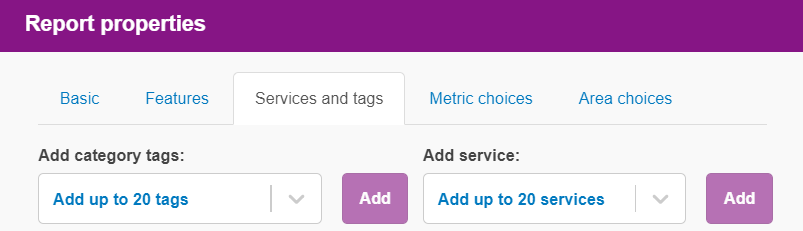
- You can add tags and service areas to make it easier when searching
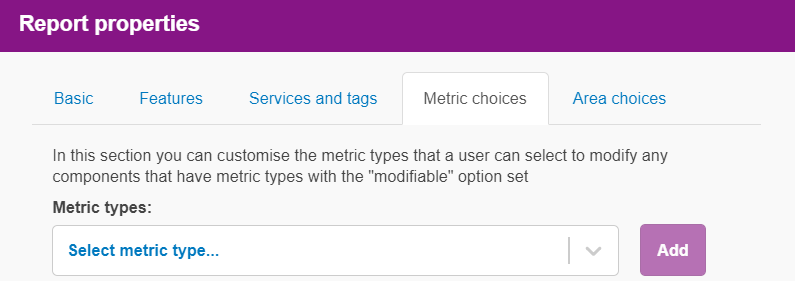
- You can set the metric choices you wish users to use when viewing your report
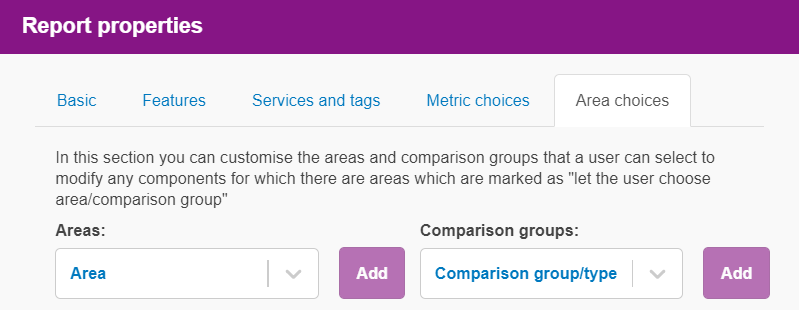
- You can set the area choices you wish users to use when viewing your report
Previous versions:
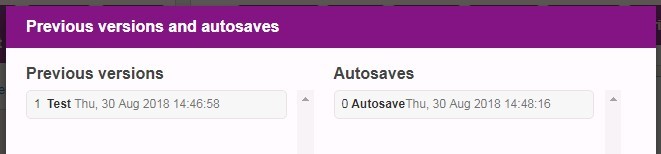
By selecting Previous versions you will see all versions of the report that you have saved, or have been auto-saved.
- Previous versions will show all versions saved manually.
- The report will autosave after every change made, and these versions can be found under Autosaves.
Add logo:
You can add your organisation’s logo to the report.
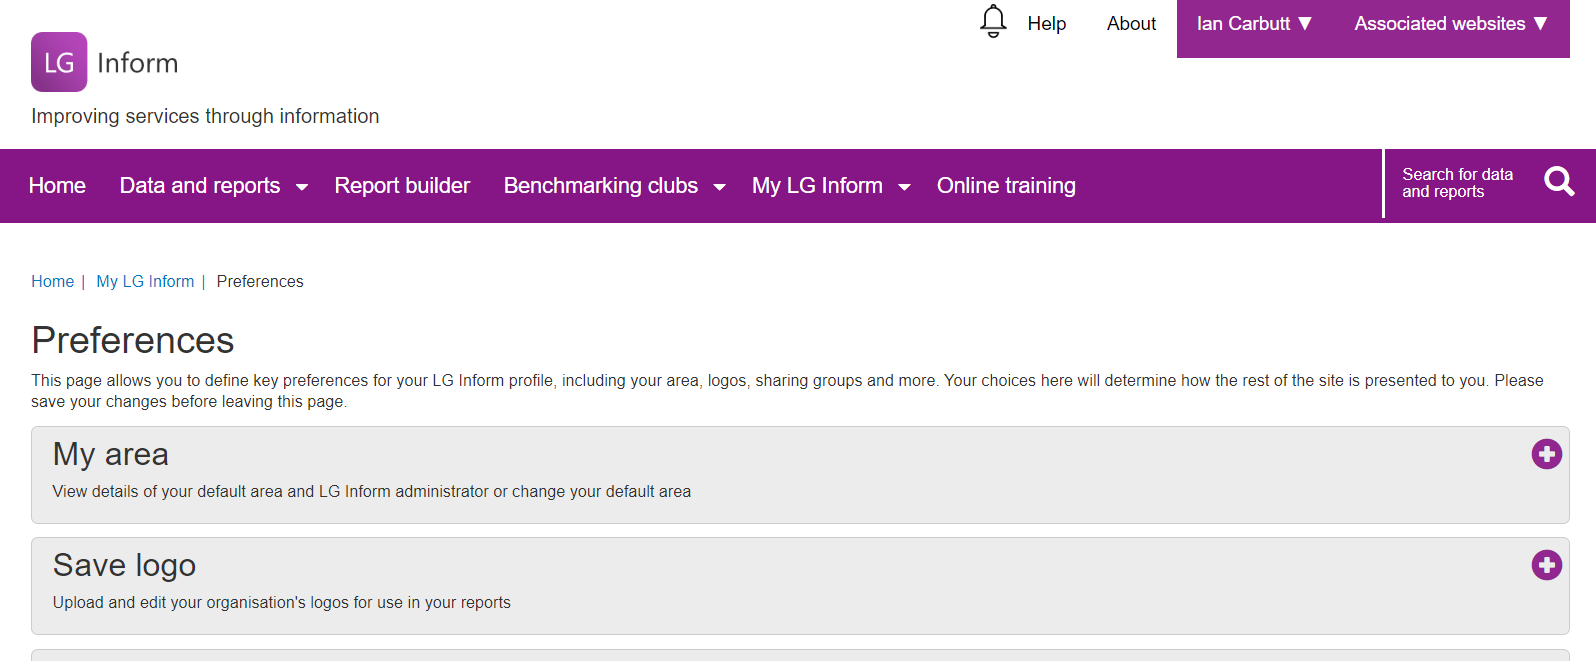
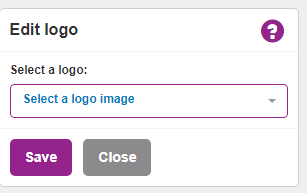
- The logo first needs to be uploaded to LG Inform. To do this, go to My LG Inform, select Preferences and Save logo. This will give you the option to upload a logo in a .gif, .jpg or .png format.
- You can only add one file to a report, therefore if you need to add multiple logos, we would recommend combining them as one file
- Selecting Add logo will bring up the option below where you will be able to choose from your previously uploaded logos.
Add report title:
Selecting Add report title will give you the option to add a title to the front page of the report.
- Please be aware this is not the same as the report name that has been added through Report properties. This title will show in the content of the report only.
Adding components to your report
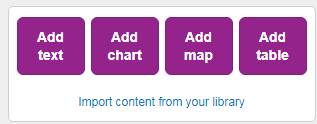
You will be given the option to add various components to your report. You can choose from text boxes, charts, maps or tables. You also have the option to add content from your library.
Please note the report builder is not to scale, displaying the report smaller (67% of A4) than the final version.
Add text
- Select Add text from the component options. The box below will appear – here you can add any text, insert tables, upload pictures and add tokens.
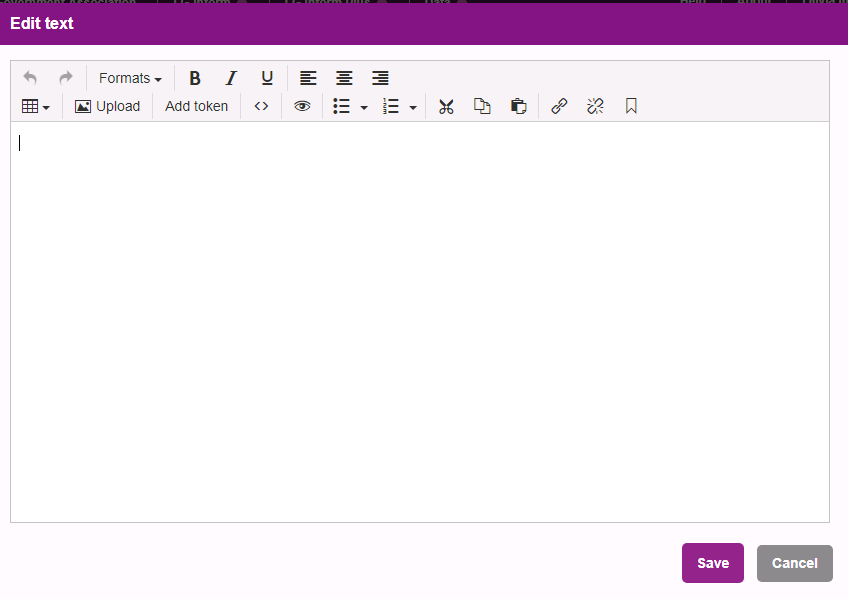
- A text token allows for text within the report to be automatically populated with data and information. The token automatically pulls numbers and text directly from the LG Inform database. When data is updated in LG Inform, the token automatically updates with the latest information.
- Once you have added your text, select Save. You will see your text has been added to the report. You can copy, edit or delete the component at any time.
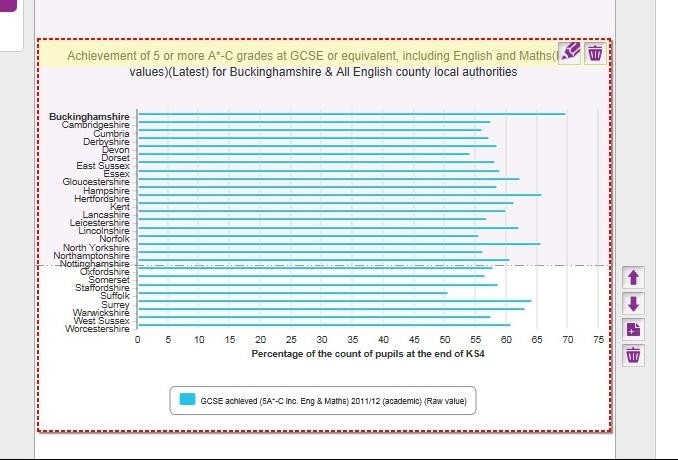
Add chart
- By selecting Add chart, you will be provided with various options to create and edit the appearance of your chart.
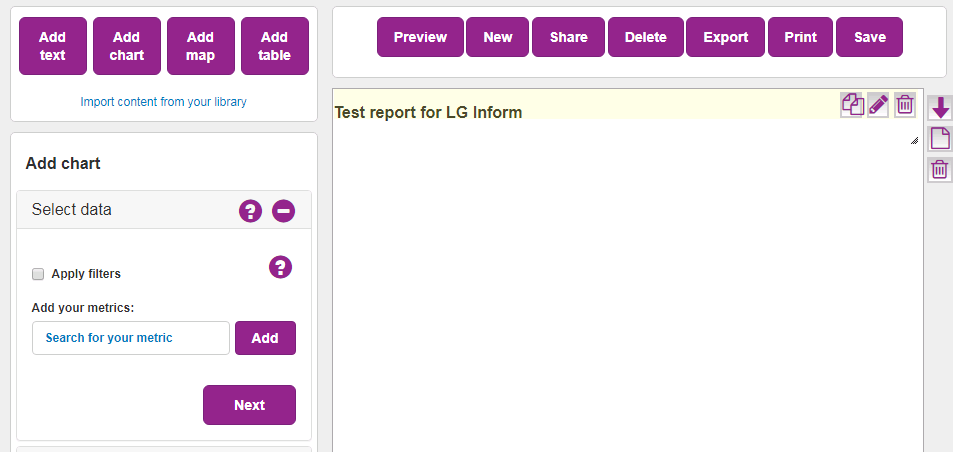
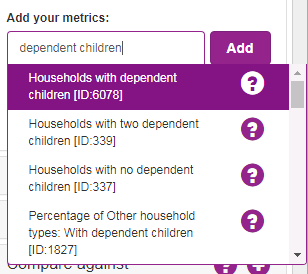
- Select data: here you can select the metric you would like displayed on your chart. Type a key word, choose your preferred metric from the dropdown list, and select Add. If you know the metric number, you can type this instead of a key word.
- If you hover over the question mark, you will find a short description about the metric, along with the data source and further details.
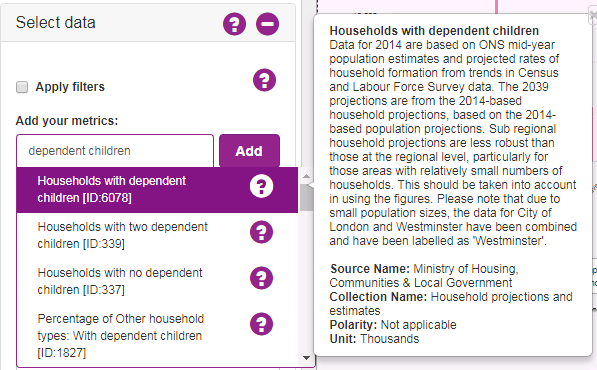
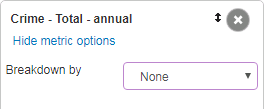
- Any metrics in bold on the dropdown list can be broken down into greater detail. Once you have added the metric, select Show metric options, and Breakdown by.
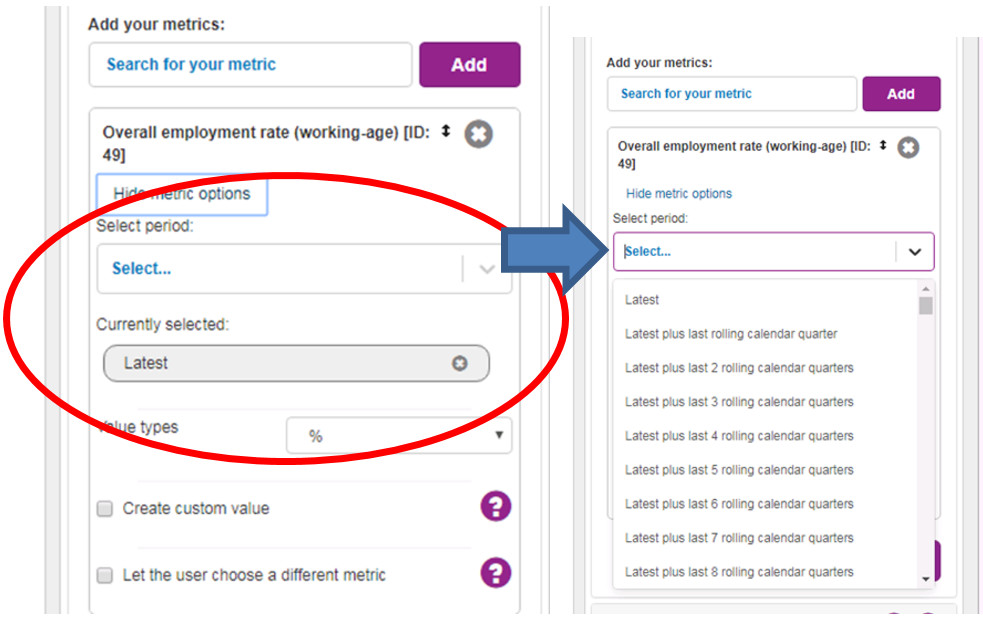
- All data included is automatically the latest available, however you can change the period covered by selecting Show metric options, and choosing your preferred dates.
- You can also add other metrics for comparison within the chart should you wish. To do so, follow the same process as above to select your preferred metric, and then select Add.
- Once you have added your data, select Next.
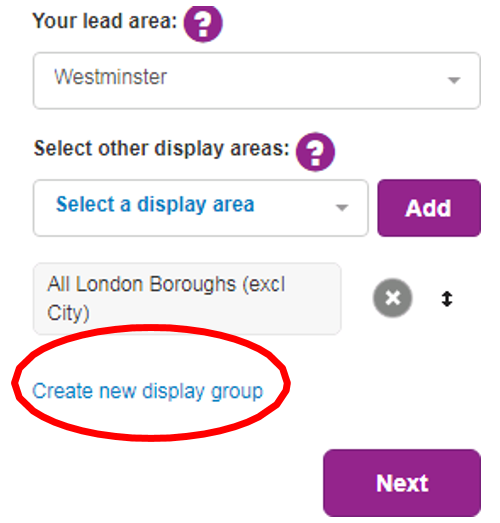
- Select area: You will now have the option to choose the lead geographical area. This will automatically have populated with the authority you have registered with, but you can change this from the dropdown menu.
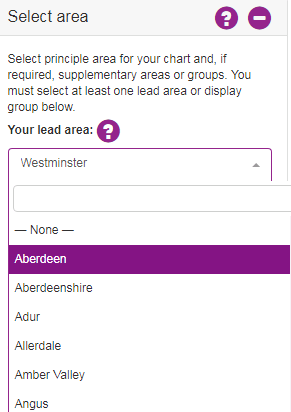
- You can either have just your lead area data showing on the chart, or you can choose to display it alongside data within a display area. Choose your display area, and select Add.
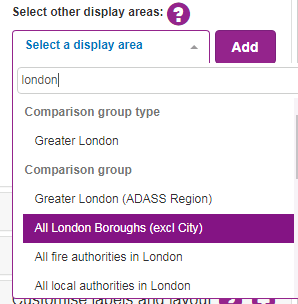
- You also have the option to create your own display group at this stage.
- To find out more about display groups, please take a look at our groups guide here
- Select chart: you will now be given the option to choose the format of the chart that you would like to create. Not all chart options will be available to select, dependent on the type of data metric chosen and display area.
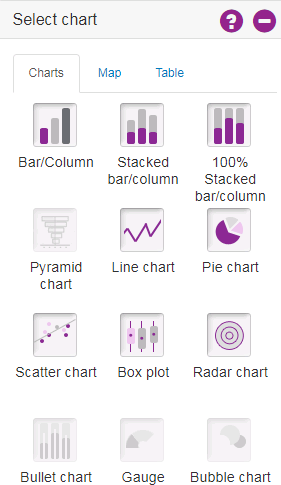
- Select your preferred chart, and it will automatically be added to the report.

- Once the chart has been created, you can either select Finish or Customise further.
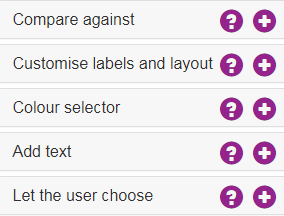
- You have the following options to further customise the chart:
-
-
- Compare against: add one or more summary statistics covering minimum, maximum, mean, median, 25th percentile, 75th percentile etc. The options available will be dependent on the chart type selected.
- Customise labels and layout: edit axes and chart display.
- Colour selector: edit the colour range used within the chart. Options 1- 8 suite charts where polarity for the metric is not applicable. Options 10-16 suit maps, or data where polarity is applicable.
- Add text: add any text to appear above the chart.
- Let the user choose: allows you to give the user of the final report the option to select metrics, areas or groups.
-
Add map
- Select Add map on the toolbar to add a map to your report.
- You will be provided with the same options as with adding a chart:
- Select data
- Select area
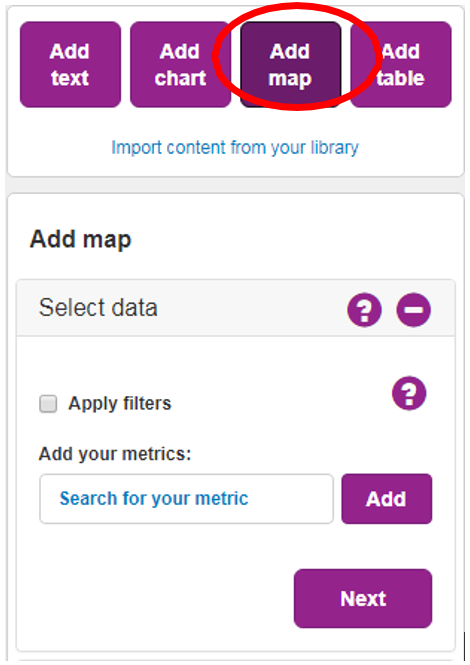
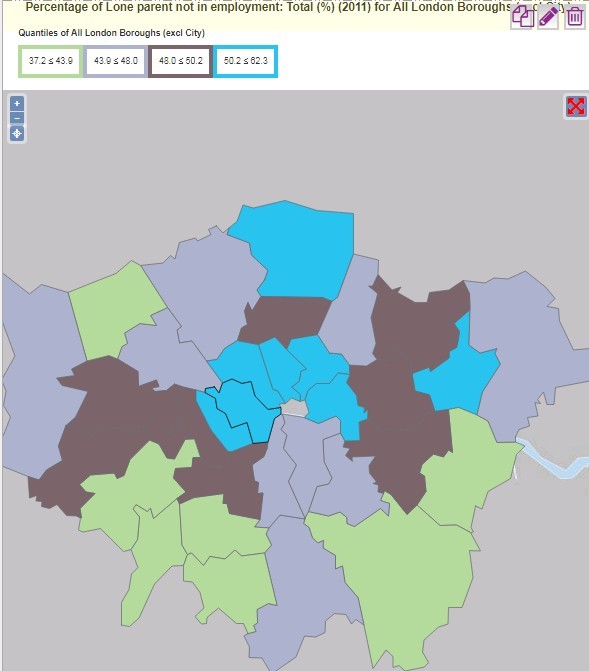
- Select map will only provide you with one choice and once clicked, your map will appear in the report.
- Compare against will give you the option to determine the colours that will show on the map through performance measurement scales (quantiles, equal ranges, standard deviation or custom), the number of bands to divide the map into and the comparison group to be used in these calculations.
- Customise labels and layout
- Colour selector
- Add text
- Let the user choose
Add table
- You can also add a table of data to your report. You will be provided with the same options as with adding a chart or map:
- Select data
- Select area
- Add table
- Compare against
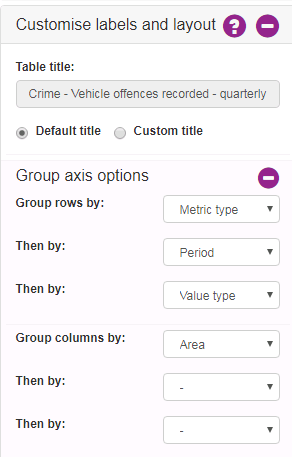
- Customise labels and layout
- You can edit the table axis which will change how the data is displayed and sorted.
- Add text
- Let the user choose
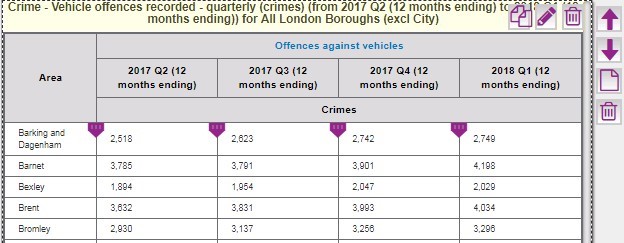
- Tables automatically display 30 rows of data on a report, so you may need to adjust the table on the report to ensure you can see it in full when editing. Your table will however be displayed in full once the final report has been exported.
Editing components
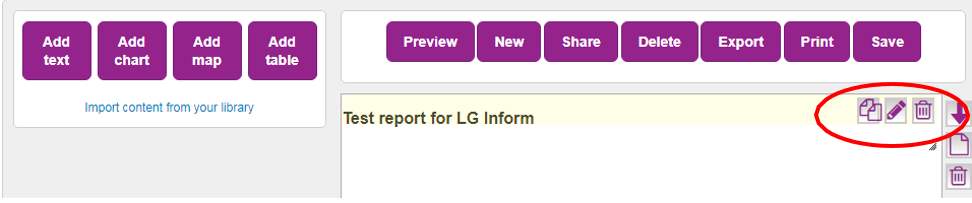
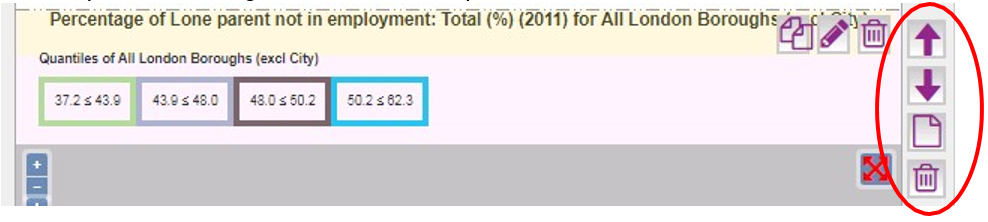
As well as being able to edit each component, you can also edit how they appear on the report. Each component will have three options as shown below:
![]() Copy - this creates a duplicate of your component, allowing you to use the same design and layout but displaying a different metric.
Copy - this creates a duplicate of your component, allowing you to use the same design and layout but displaying a different metric.
![]() Edit – selecting edit on each component will take you to the step-by-step wizard used to set up the component initially to edit as required.
Edit – selecting edit on each component will take you to the step-by-step wizard used to set up the component initially to edit as required.
![]() Delete – this will remove your component from the report.
Delete – this will remove your component from the report.
Back to top
Finishing your report
The reports are optimised for A4 printing, but all components can be adjusted to your preference. If any of the content overlaps, or covers a page break it will be highlighted in red:
You also have the option to move components around, and change the order of pages.
- You can drag and place the components to your preferred location, or use the options on the right side of each component:
Once your report is finished…
Once you have completed your report, click 'save' and you can do the following:
- Preview: view the final version of the report as it will appear when printed. When in Preview, you can also share, print or export your report.
- New: creates a new report, but ensure your existing report is saved beforehand
- Share: share your report with either individuals or groups
- Delete: all versions of your saved report will be deleted
- Export: export your report as either a PDF or RTF file, or as code embedded onto your website (once embedded, data in the report will automatically update when updated in LG Inform).
- Print: takes you to a new window with the option of printing your report.
- Save: save your report to your library on LG Inform
© Local Government Association, June 2022
Back to top